Ademero – CapturePoint QuickStart Help File
Download
CapturePoint - Quickstart Instructions
Creating An Account
The launch of the CapturePoint™ application checks to make sure you have a valid account linked to the system. If this is a first-time installation, an Account Details dialog will appear, which requires a few fields of information to create or link your account.
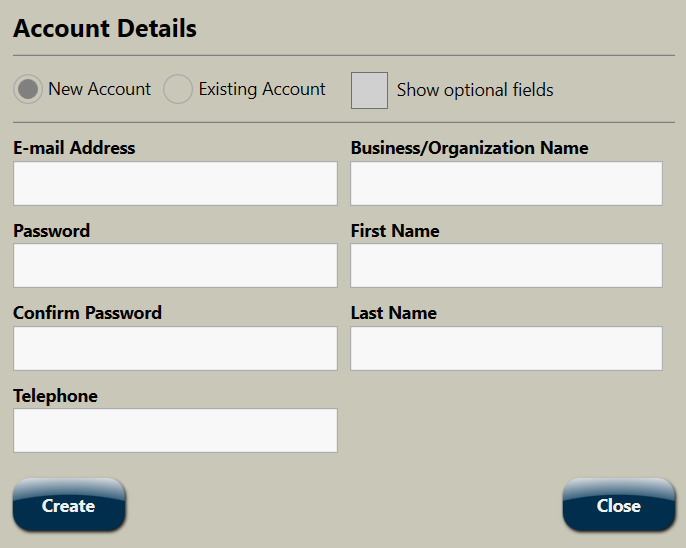
Upon successful linking of your new or existing account, an e-mail will be sent to the e-mail address provided in the account-creation dialog. To activate the account simply click on the link provided in the e-mail.
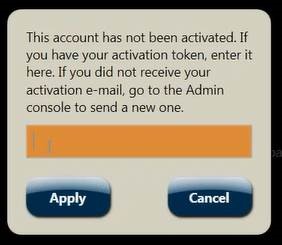
If you cannot click on the link in the e-mail and you later attempt to capture an image you will be presented with a dialog to enter your activation token. In this instance, enter the activation token found in the e-mail to proceed. Once your account is activated, CapturePoint is ready to be configured.
Jobs
The CapturePoint application allows for the creation and configuration of multiple. For example, you can create a job for Accounts Payable and a separate job for Human Resources, or you can create one job for all company needs.
Click on the ‘Ellipsis’ ![]() button to view the menu bar. Create a new job by clicking ‘Add New’ on the menu bar. Click on ‘Rename’ to rename any job.
button to view the menu bar. Create a new job by clicking ‘Add New’ on the menu bar. Click on ‘Rename’ to rename any job.

Content Central™ Connection
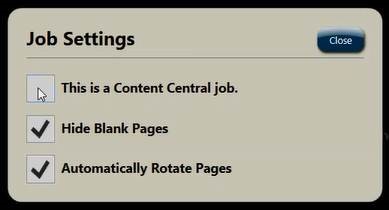
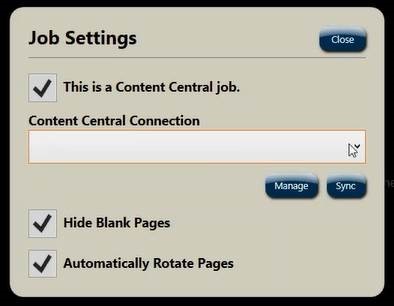
CapturePoint Jobs can be synchronized with a Content Central implementation. To sync to Ademero’s Content Central™ Document Management Software from CapturePoint, click on ‘Settings’ on the menu bar.
In the ‘Job Settings’ menu, click to check the option ‘This is a Content Central Job’. When the drop down appears, click on the ‘Manage’ button.
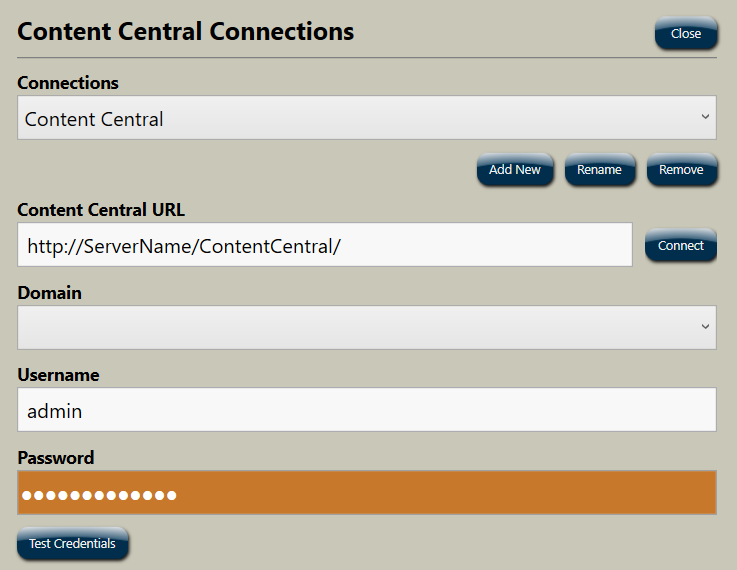
Click on ‘Add New’ in the Content Central Connections window. Provide a name to the Content Central connection. Provide location information for Content Central and credentials. After clicking ‘Test Credentials’, a ‘Credentials passed’ prompt will appear after a successful connection.
Close the Content Central Connections dialog, then click on ‘Sync’ to sync the Active Job to Content Central. This will import all Catalogs, Document Types, and Index Fields from the Content Central implementation.
Image Navigator
The Image Navigator consumes the majority of the CapturePoint application interface. Here captured images can be zoomed, rotated, deleted, manually classified, and more. The centered image in the navigator will receive any actions specific to a page or document.
To navigate the images, touch or click an image and swipe to the left or right. You can also use the Navigation Shuttle located in the lower left of the current panel and in some locations use arrow keys and the Page-Up, Page-Down keys.
Capture Area

In the ‘Capture’ area, you can select a network folder for capturing or importing documents, and you can also connect to a local scanning device to scan images.
‘Network-File Device’ allows for importing scanned documents from a local or network folder location accessible on your workstation.
Click on ‘Add New’ to add a new device for scanning or importing to CapturePoint. Click ‘Capture’, to capture files or documents. Documents captured are processed automatically with Optical Character Recognition (OCR), and the images will be displayed in the Image Navigator.
Classify Area

In the ‘Classify’ area, CapturePoint allows for the creation of document classifications. As an example for Accounts Payable documents, the first level of classification may be ‘Accounts Payable’, and the second level of classification may be ‘Invoices’ or ‘Packing Lists’. Creation of multiple levels of classification is also possible as needed.
If the CapturePoint Job is synced to a Content Central implementation, the classify levels are based on Content Central’s Catalog and Document Types. These are created automatically and cannot be modified. To add new Classification Levels, click on the ‘Ellipsis’ ![]() icon and select ‘Classify Configuration’. New classification levels and classifications within those levels can be added and configured here.
icon and select ‘Classify Configuration’. New classification levels and classifications within those levels can be added and configured here.
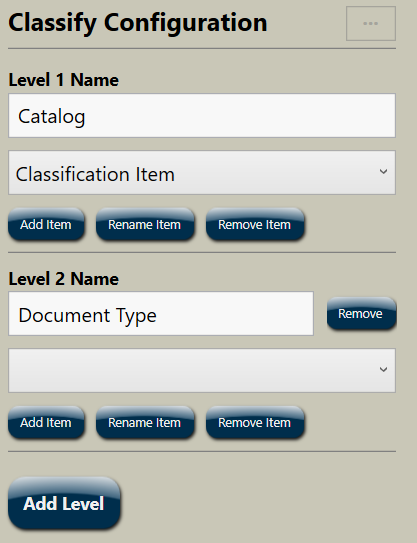
Once classifications for your documents have been created, captured documents can be manually classified using these classifications.
To manually classify a document, click ‘Classify’ within the Image Navigator to quickly select from the available list of classifications. Once a document has been classified, a boundary bar will be displayed on the left edge of the first page of the document. Detailed information about the selected classification will be overlaid at the top left of the image.
Creating Classify Rules
Classify Rules are used to automatically determine a document’s classification during the capture process.
To configure Classify Rules, capture one or two example images for the classification you would like to configure. For best results, capture two images. Click on the ‘Ellipsis’ ![]() icon to select the ‘Classify Rules’ panel.
icon to select the ‘Classify Rules’ panel.
In the ‘Classify Rules’ panel there are two options to choose from: ‘Add Rule’ or ‘Generate Rule Group’.
1.Using the ‘Add Rule’ Option
Use the ‘Add Rule’ option to manually create Classify Rules by adding waypoints for the CapturePoint application to discover the document. In the first dialog that appears, choose whether the content is text-based or barcode-based. Provide a rule name that is relevant to what will be targeted on the image, then click ‘Next’.
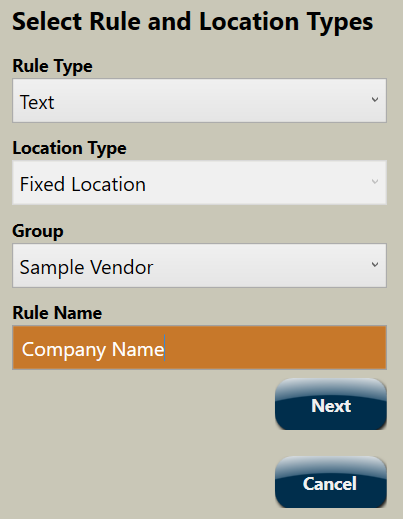
Set the waypoint by drawing a box to signify content of interest on the image. Choose generic, structural content that will remain unchanged in position and content from document to document. You can move the dialog to another area by clicking and holding at the top of the dialog and moving it.
Multiple rules for a single classification are recommended. After the first rule has been created for a given classification, ensure the Group selection in the first dialog matches the Group from the first rule you created.
2.Using ‘Generate Rule Group’ option
The ‘Generate Rule Group’ option automatically creates Classify Rules in CapturePoint. These generated Rule Groups can be modified as necessary.
If you’ve captured two images for classification, set the centered image in the Image Navigator to the first of the two, then choose the ‘Compare to Next Page’ option. Otherwise, for a single image, choose ‘Current Page Only’. Comparing two images side by side will provide better results than analyzing a single image.
Index Area

In the ‘Index’ area, CapturePoint allows for creation of Index Fields to provide document detail. These metadata can be exported along with documents.
If the CapturePoint application is synced to a Content Central implementation, Index Fields are automatically imported.
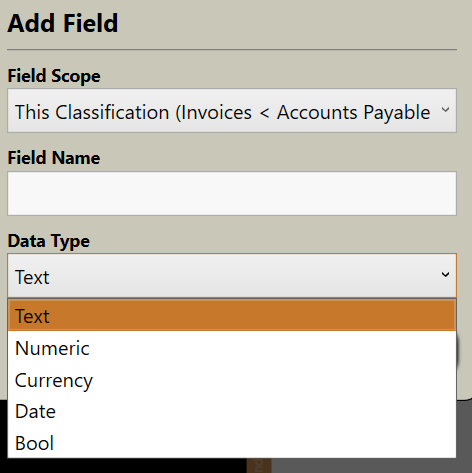
To create new index fields from the Index area, click on the “Ellipsis” ![]() icon to select ‘Field Configuration’. In this panel, click ‘Add Field’. Enter the Field Name and Data Type. Click ‘Apply’ to add the field.
icon to select ‘Field Configuration’. In this panel, click ‘Add Field’. Enter the Field Name and Data Type. Click ‘Apply’ to add the field.
Fields can be further customized by selecting the ‘Properties’ button for a given field.
Using ‘Field Rules’, index fields are automatically populated during the capture process. To create a new Field Rule, click on the ‘Ellipsis’ ![]() icon to select ‘Field Rules’. Click on ‘Add New’ to create a rule.
icon to select ‘Field Rules’. Click on ‘Add New’ to create a rule.
In the ‘Select Rule Configuration’ window specify the Rule Type, Location Type, and Field to populate. Selecting a specific Classify-Rule Group will cause CapturePoint to extract the field information when the document is classified. This provides best performance. If you have trouble obtaining field information, try switching the Classify-Rule Group to ‘Any’, which will cause CapturePoint to extract the field information in a separate process, which may provide better results. The Classify-Rule Group can be changed at any time by clicking the ‘Properties’ button for the field rule and changing the value in the ‘Options’ area.
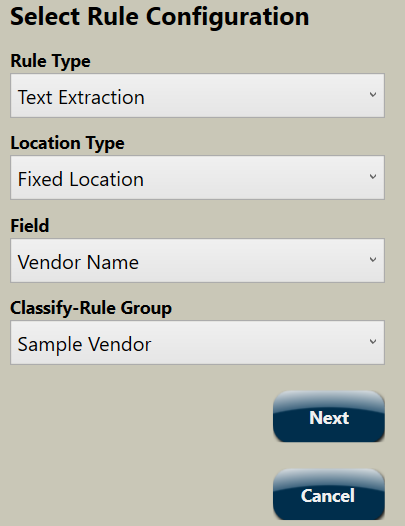
After making your selections for the new rule, click ‘Next’. Select the location of the field value on the image by drawing a box around the text or barcode. When complete, click ‘Finish’.
Rules can be created for every field within a classification.
Once configuration is complete for all index rules, the CapturePoint application will classify and index each document as captured images are matched and field data is extracted.
Export Area

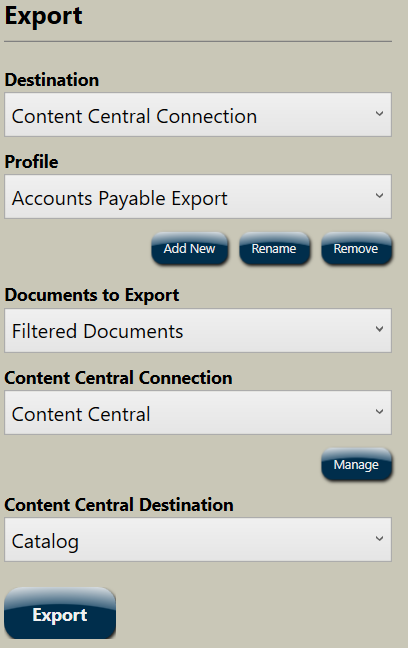
CapturePoint allows for exporting to different destinations and manages multiple export destinations through the use of Export Profiles.
To create a new profile, choose the appropriate Destination. Click on ‘Add New’ under the profile section to create a new profile and provide a name. Once a profile has been created for the appropriate destination, additional options are available.
The Documents to Export selection allows you to choose whether to export all or some of the documents in the current Job.
The Content Central destination will export documents to the Content Central implementation linked to a Job in Job Settings. To override this, choose a different Content Central Connection or click on ‘Manage’ and add a new Content Central connection. This dialog is the same as when creating a new Content Central connection in Job Settings.
After choosing a Content Central Connection, select the appropriate ‘Content Central Destination’ to choose whether documents will be routed to the Coding Queue or directly to a Catalog in Content Central.
Click the ‘Export’ button to begin the export process. If any OCR, classification, or index-field processing is pending, exporting will begin as soon as it finishes.
