• Videos
  • Downloads
  • Documentation
  • Articles
  • FAQs
  • 863-937-0272
  • Ademero.com
Learn - Ademero
  • Videos
  • Downloads
  • Documentation
  • Articles
  • FAQs
  • 863-937-0272
  • Ademero.com

Installing CapturePoint

Live Chat

Get help now by chatting online with one of our support reps. Start now on the bottom right of your screen.

E-mail Support

Send your questions to support@ademero.com for a quick response.

Phone Support

Dial (888) 276-2914 to speak with a support representative.

Support Tickets

Click to check the status of an existing ticket or create a new one with the new support portal.

Generic filters
Exact matches only
Search in title
Search in content
Search in excerpt

Click to start your FREE TRIAL of CapturePoint, Document Scanning Software today!

Steps for Installation of CapturePoint, Document Scanning Software.

  1. Follow prompts to install the CapturePoint requirements Microsoft SQL Server
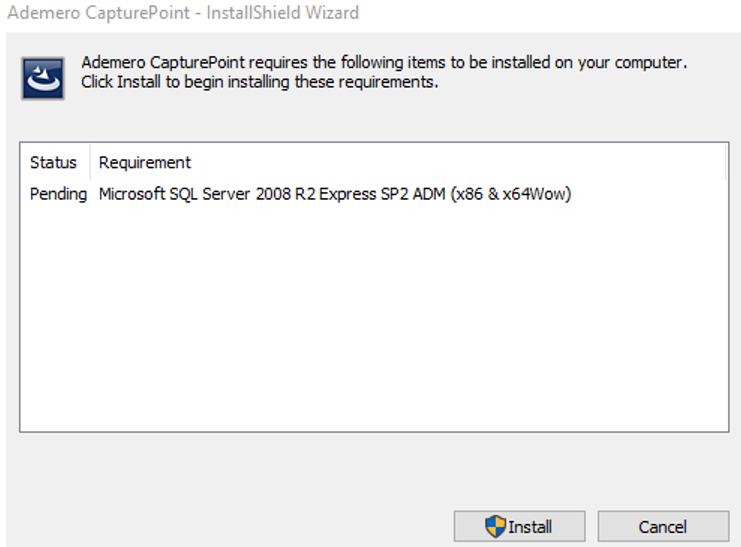
Installing CapturePoint - Requirements Prompt

2. Click Install to accept the requirements.
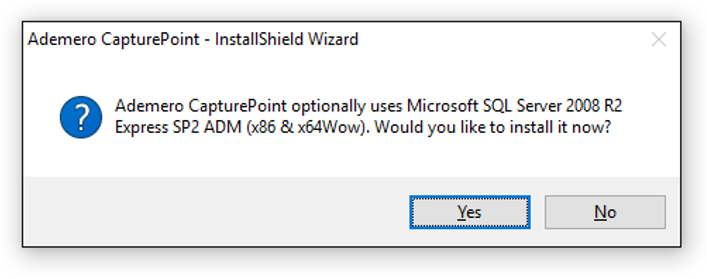
Installing CapturePoint - Requirements Prompt - acceptance

3. Continue following prompts for installation of requirements.
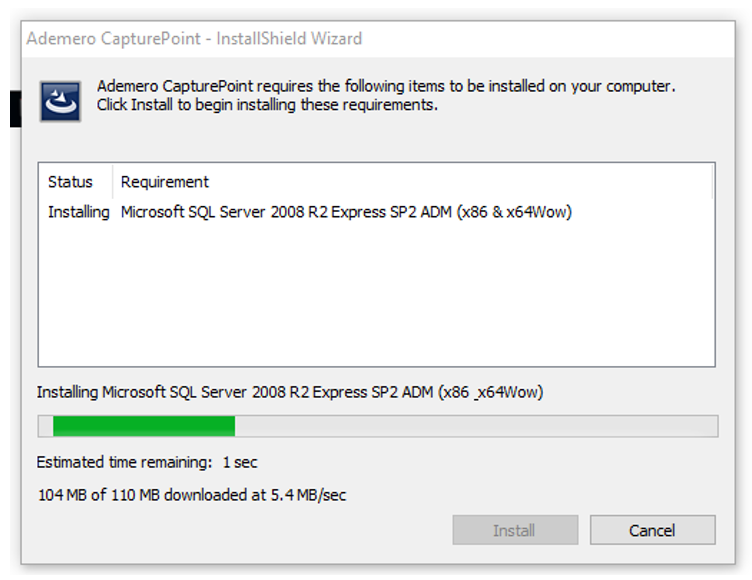
Installing CapturePoint - Requirements Prompt - installing

4. Follow prompts to install the CapturePoint program.
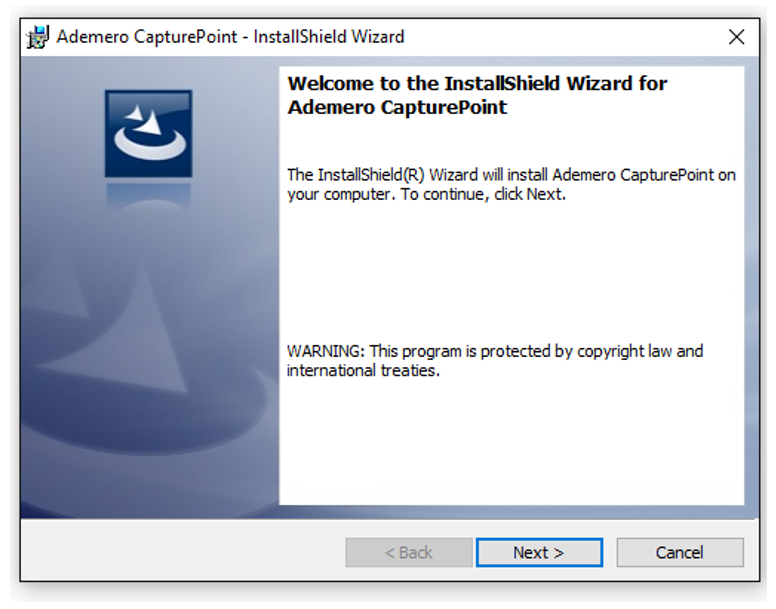
Installing CapturePoint - Install Wizard Screen

5. Review and accept the Ademero, Inc. End-User Licenses Agreement [EULA].
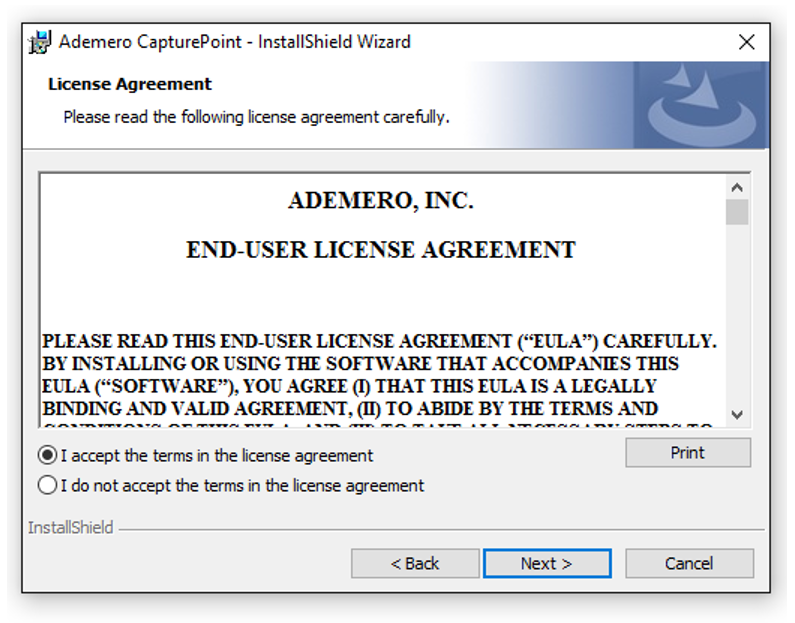
Installing CapturePoint - Install Wizard EULA

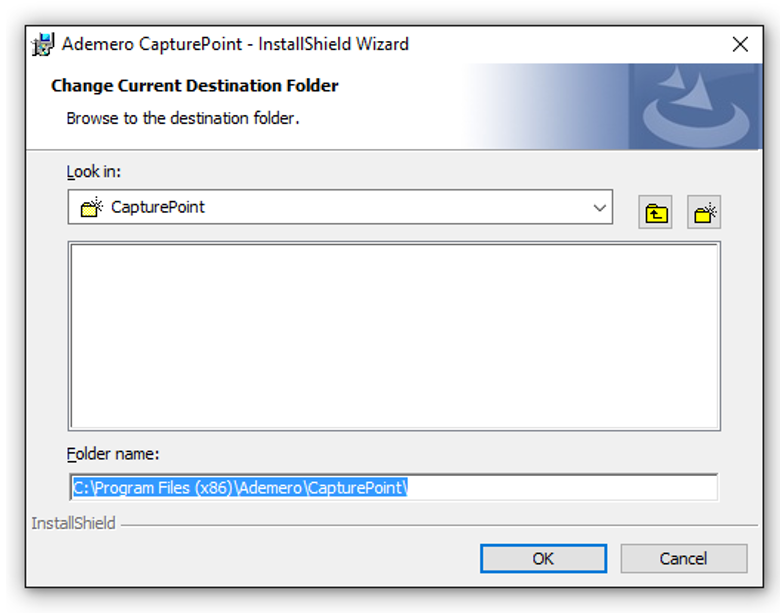
6. Confirm the file destination on the computer. If a change is needed, make the necessary change and hit ‘OK’.
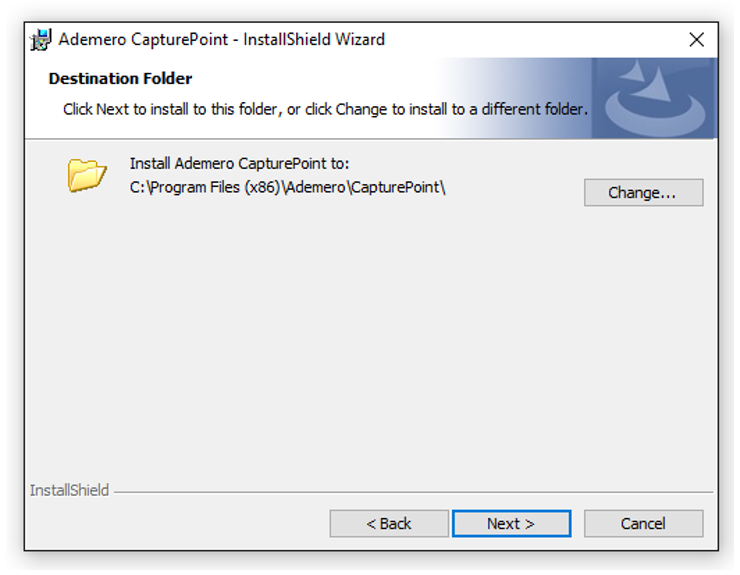
Installing CapturePoint - Install Wizard - Destination Drive
Installing CapturePoint - Install Wizard - Choose Drive

7. Continue with the Installation Prompts.
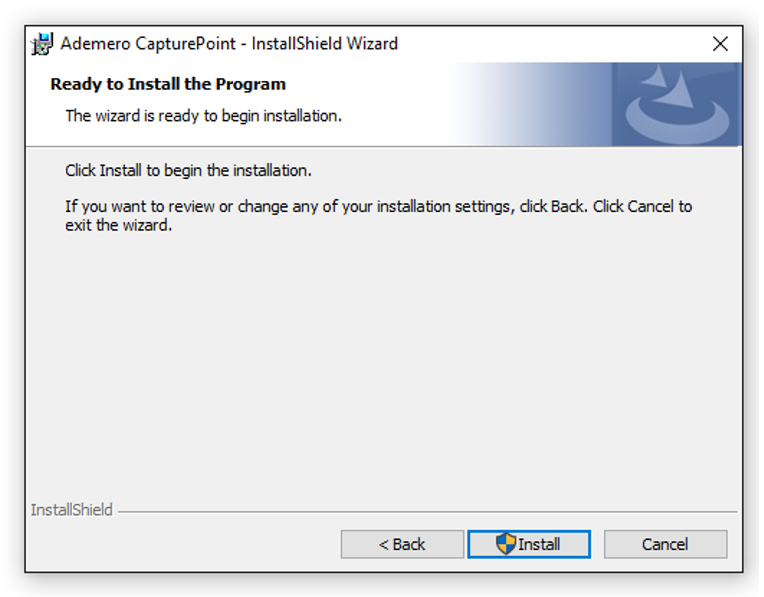
Installing CapturePoint - Install Wizard - install now

8. To complete the install without launching CapturePoint, click ‘Finish‘. To launch CapturePoint from this window, check the ‘Launch Ademero CapturePoint‘ box, then click ‘Finish‘.
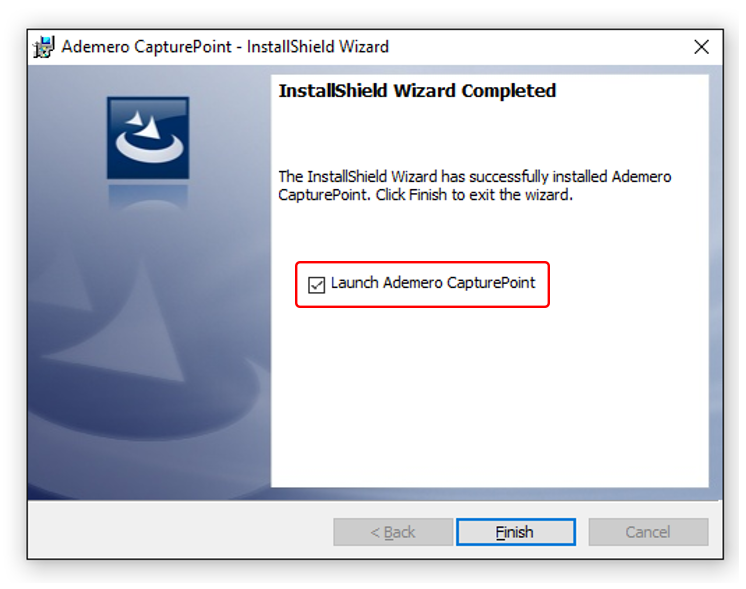
Installing CapturePoint - Install Wizard - Launch Now

Steps for Creating a New Account in CapturePoint, Document Scanning Software.

  1. Launch CapturePoint
Installing CapturePoint - Launch Splash Screen

2. To create a new account, click ‘Yes‘ when prompted.
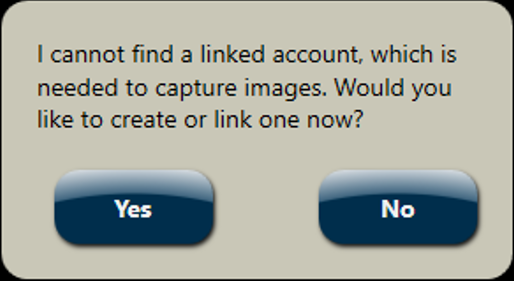
Installing CapturePoint - Create New Account

3. To create your account, enter data into all fields and click, ‘Create.’
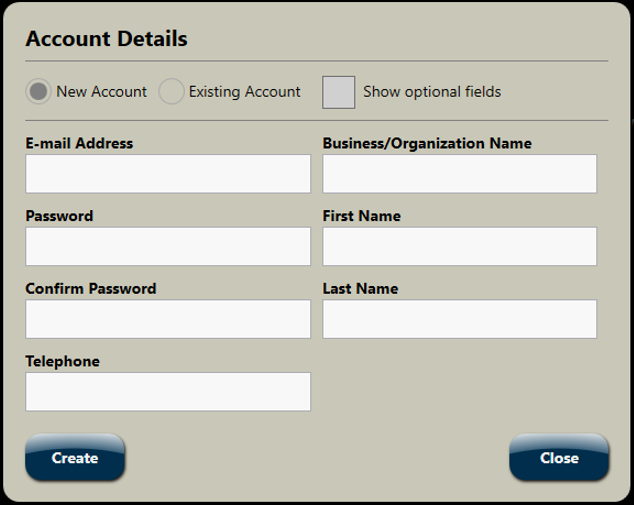
Installing CapturePoint - Create New Account - Field Data Blank Popup

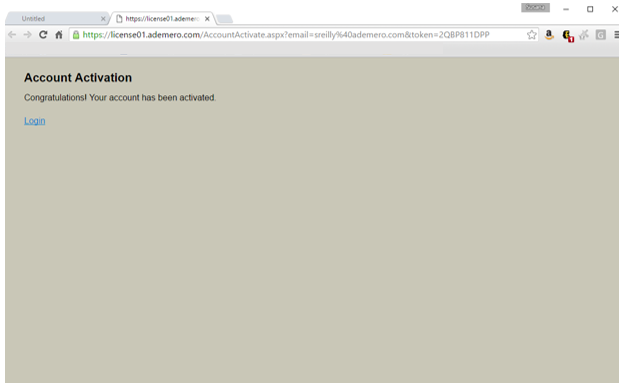
4. An activation e-mail will be sent to the e-mail address entered. This e-mail will provide a link to complete the activation process. This link will launch on your default browser window and confirm the successful activation of the account.
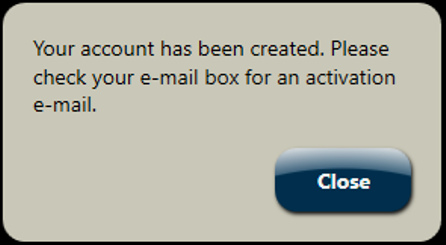
Installing CapturePoint - Create New Account - Account Created Popup
Installing CapturePoint - Create New Account - Activation Link Popup

5. To resend the activation link from CapturePoint, click the ‘Admin‘ button in the top right.
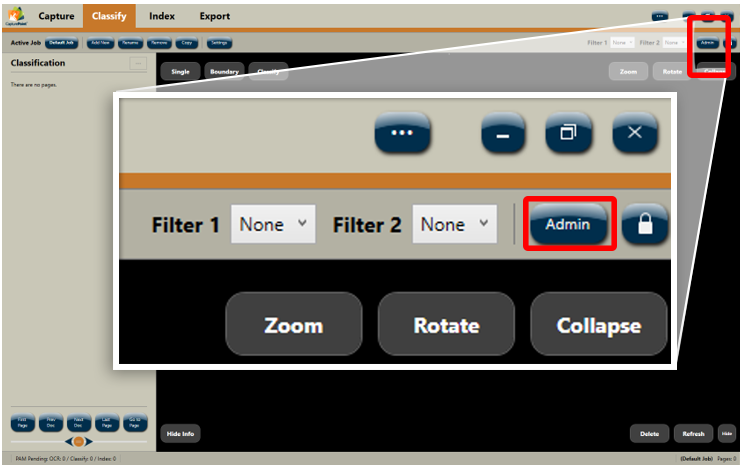
Installing CapturePoint - Create New Account - Alternate to Email Activation

6. Click on ‘Resend Activation E-mail’ to resend and activate.

*Tip: The Machine ID is also found here.
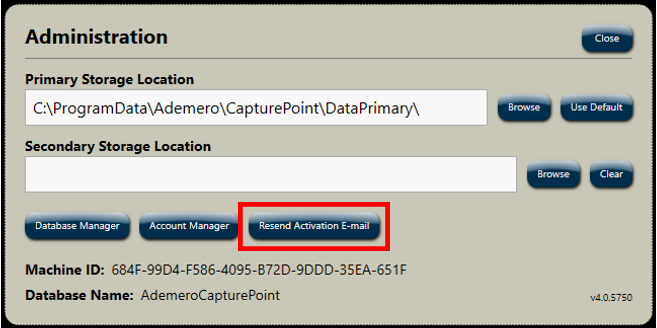
Installing CapturePoint - Create New Account - Alternate to Email Activation - Resend Email
Kristen Lance

Was this article helpful to you?

Related Articles

  • Mike Minute | How To Process Invoices Quickly With Document Management Software
  • CapturePoint – Installation
  • CapturePoint – Rule-Building Tips and Considerations
  • CapturePoint – QuickStart
Comments are closed.

PRODUCT INFO

Document Management
Software

Content Central
CapturePoint

SOFTWARE DOWNLOADS

Content Central
CapturePoint

RESOURCES

Videos
Articles
PDF Downloads
Online Documentation
FAQs

CONNECT WITH US

Facebook
Twitter
LinkedIn
Google Plus
YouTube
©2004 - 2018 Ademero, Inc. All rights reserved.